I remember when I was a beginner and first started my yoga journey “on my own”, and this was before yoga started to dominate the online space. I heard so many great things, but had no idea what I was doing. I spent a few awkward minutes trying and failing , feeling defeated, and giving up that day.
Accept that I wasn’t born with a body that could stretch like that. (Baskets are too hard) I eventually found a gym that I liked and it helped me understand the gym a little better (I still can’t do anything resembling a split), but I still felt like I needed the structure of a class and the guidance of a teacher to get it done. This also held me accountable, because despite my best intentions, I rarely made it through a full hour when I decided to do it on my own.
Over time, I started to see some gains from yoga here and there; a slightly more flexible body and a much more stable state of mind . I really started to prioritize my practice. I didn’t just want to float through the air with that yoga high on the days I had a consistent practice, I wanted that high every day . So it was time to start practicing at home. This is the beauty of yoga! When you stick with it, the wheels start rolling and there’s no stopping it. Even if you don’t practice for a while, you WILL ALWAYS come back to it. Once you know, you know.
When I decided to practice at home, I realized that it didn’t have to be an hour and a half at a time. It didn’t have to be an hour. Even if it was just fifteen minutes a day, the world around me began to change profoundly. It didn’t matter if I could make it to class or not. I could always take at least ten minutes to relax my body and mind, connect with my breath and the beauty of the present moment. The effect was extraordinary . How to Start Yoga Alone is a beginner’s guide that provides detailed information on everything you need to start a yoga practice at home.
What is the best way to start yoga?
The best way to start yoga is to just start! All you really need is yourself and an open mind. If you don’t have a mat, lay out a towel or sarong. If you don’t have props like blocks and straps, find things around the house like books and belts. Use pillows for support and search online for yoga videos that are appropriate for your level. Once you get started, it will be much easier to commit to your practice. Over time, you can build up the right equipment and create a space that appeals to you every day.
Yoga has no end goal, it is a lifelong journey and you should enjoy every step. It is important to always listen to your body, respect your body and trust the process. With time and commitment, your body and mind will grow and mature.
It won’t be long before you start to notice the benefits in every aspect of your life. The greatest rewards from yoga are really what you gain in the world, in your relationships with others, and with yourself. The calm, peaceful mind you cultivate on the mat will begin to follow you elsewhere. You will find yourself more content with the present and less agitated or caught up in the stories in your mind. All of this and more will be yours when you start practicing yoga regularly, so what are you waiting for?
What do you need to start practicing yoga at home?
All you really need is yourself and an open mind. You should also bring a yoga mat , but if you don’t have one, a sarong or towel will do! When it comes to props, they’re not essential, but there are plenty of things around the house that you’d be surprised to find you can use. Instead of blocks , use books. Use a belt instead of a strap, and roll up a blanket instead of a pillow. Create a space Creating a space that’s welcoming and calming can really help you get motivated to get on your mat and practice. You know how they say a clean room is the key to a clear mind , and it’s absolutely true. We want to create a space that reflects the state of mind we’re trying to cultivate – quiet, clear, and free of distractions! This will help set the tone and help you get into a focused state a little easier. Get online If you’re not confident enough to practice on your own, there’s still no reason not to practice at home! There are plenty of online yoga teachers and videos to offer support and guidance, just browse through a few to find the right one.
The great thing about online yoga is that there are so many options. You can be specific about your goals, what body parts you want to work on, and when you want to practice.
Schedule your time
If you’ve done all of these steps, you’re ready to go. All that’s left is to get on your mat! But we all know that planning and creating a space to practice yoga at home is one thing, but actually committing to it is another. To make sure you can stick to it, you should schedule it in advance.
Yoga only works if you are consistent and practice regularly! One of the benefits of practicing at home is that you are not limited to a specific schedule or class length. This can also be a source of frustration since there is no teacher or time frame to supervise you. So with that in mind, I recommend looking at your upcoming week and scheduling a time to practice ahead of time and making it non-negotiable. Aim for a minimum of 15 minutes, which is short enough to not feel overwhelming, but long enough to encourage solid habit formation.
Yoga exercises at home
We’ll break down the steps you need to take to set up a successful home yoga practice for beginners. We’ll cover what you’ll need, what kind of space you want to create, the importance of scheduling time, and finding online videos that can guide you until you feel more confident practicing on your own.
When practicing at home without support, it is important to listen to your body and adjust as needed. Never be afraid to rest in Child’s Pose and don’t push yourself beyond your limits, as your body needs time to open up. The real benefits of yoga are the changes you begin to see off the mat and they will come with regular practice. Trust the process and enjoy the journey.
Infographic guide to starting yoga at home for beginners
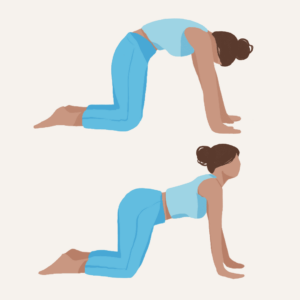
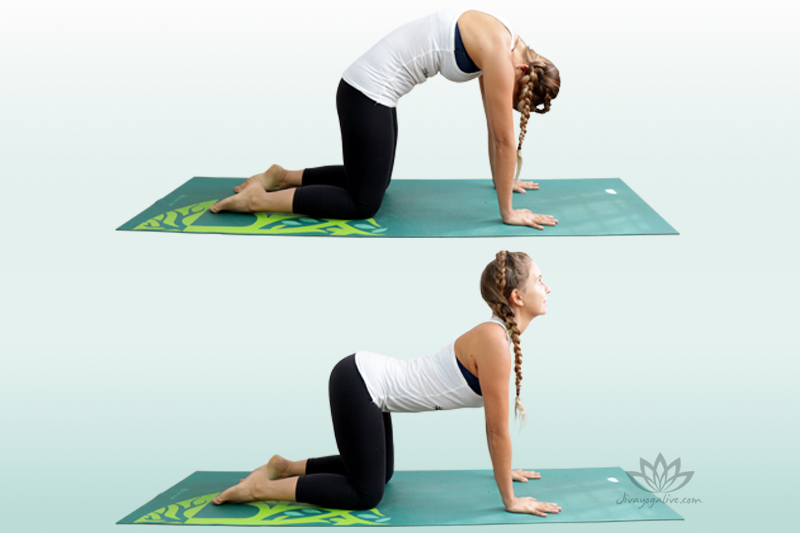
Kat-ko – Marjaryasana-Bitilasana
Lie facedown, making sure your wrists are in line with your shoulders and your knees are in line with your hips. Your spine is neutral, your head and neck are in a straight line, and your gaze is slightly down and toward the top edge of the mat. Inhale, lower your belly, bring your heart forward, and arch your back into Cow Pose.
Exhale and come into Cat Pose by pressing into the palms, rounding the upper back, bringing the navel to the spine and dropping the chin to the chest. Inhale, lean forward again and open the chest. Exhale, push back, rounding the spine. Doing a few of these Cat-Cow movements will warm up the spine and let it know that we are in this pose.
This pose mobilizes the spine, shoulders and neck and is a perfect warm-up for all levels of yoga. It is a gentle way to prepare the body and spine for deeper stretches and is a safe way to relieve back tension.
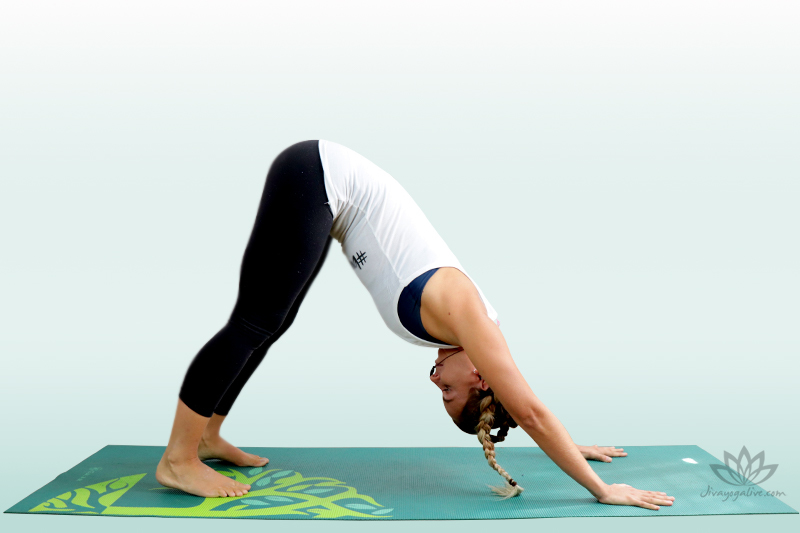
Downward Facing Dog – Adho Mukha Svanasana
Curl your toes, push your palms in, and lift your hips into a downward facing dog. Start by stepping your feet out and bending your knees. Press down into your palms, spread your fingers wide, and relax your head and neck.
Downward facing dog is a chance for you to catch your breath and regain your balance before moving to the other side of your body while swimming.
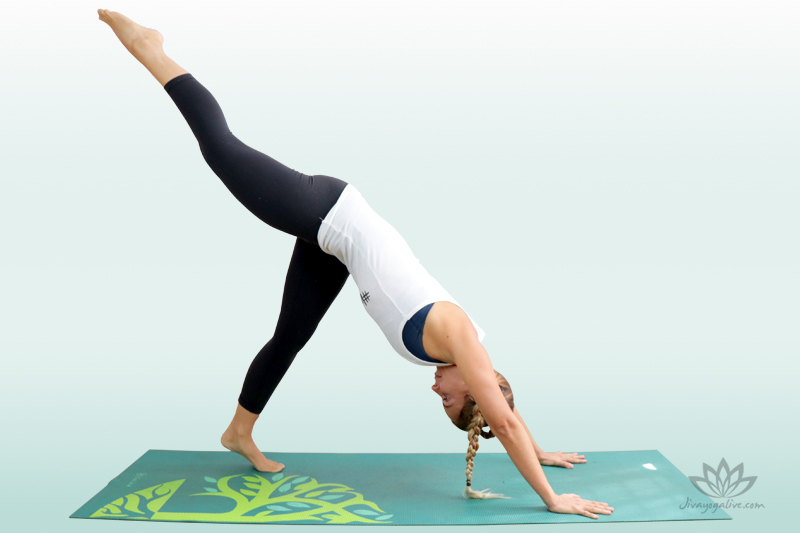
One-Legged Downward Facing Dog – Eka Pada Adho Mukha Svanasana
Lift your right leg back and up into downward facing dog .
It’s common to put your weight on your left shoulder here, but try to keep your shoulders square by pressing evenly into both hands.
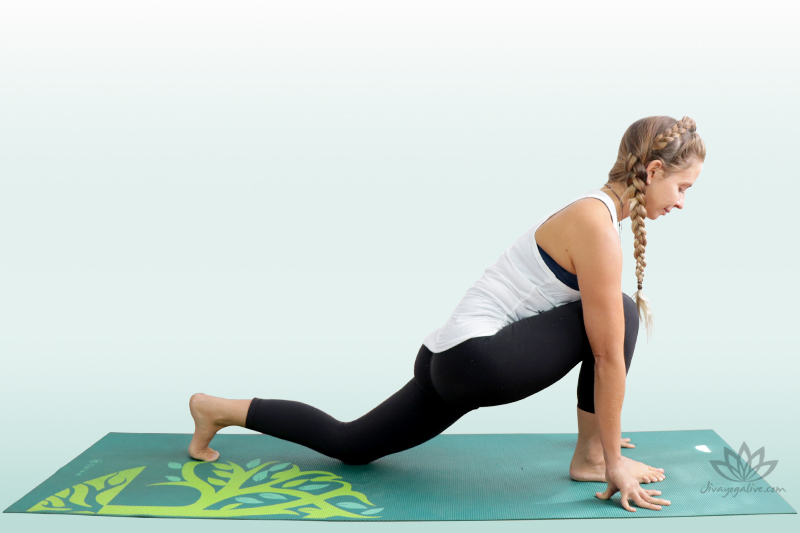
Low Lunge Pose – Anjaneyasana
Bend your right knee and step forward, shifting your weight onto your hands and stepping between your palms, into a low lunge position . Your hands will touch both sides of your front foot and you can use your fingertips for support. You can raise or lower your back knee for more support. Make sure your neck and head are in line with your spine.
In the Low Lunge, you can begin to work on the flexibility of your posterior hip flexors by engaging your glutes. Try to keep your hips square by bringing your posterior hips forward.
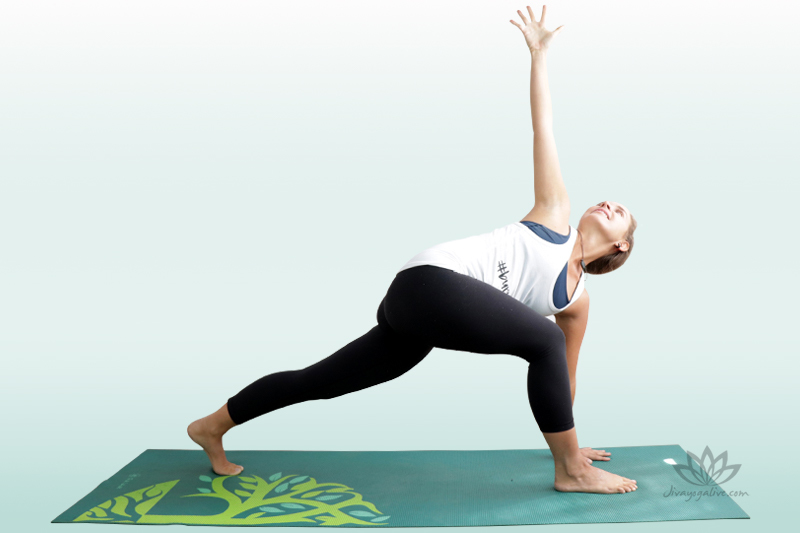
Rotated Side Pose – Parivrtta Parsvakonasana
Place your left palm on the ground and press it flat, then use your right arm. Rotate your chest to open it up and come into a side angle . Look up. Really press into your left palm and the ball of your left back foot. Inhale and open your chest more.
This pose strengthens and stretches the legs, groin, hamstrings, opens the chest, shoulders and spine.
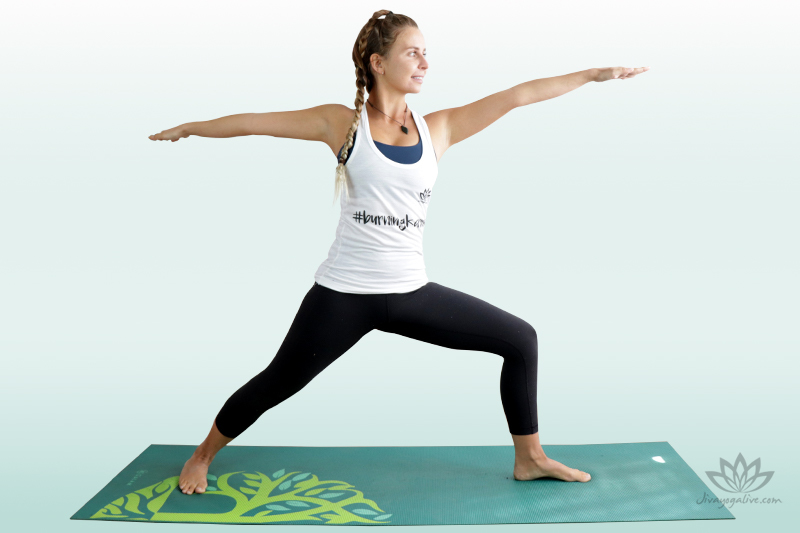
Exercise 2 – Virabhadrasana II
Turn your back leg down and rotate your arms to come into Warrior 2. The front toes point forward and the back foot forms an angle. Press firmly into the outer leaf of the back leg. Extend your arms out to the sides and as you exhale, lower your body a little further, keeping your legs low.
Warrior 2 Pose is a deep leg strength exercise and is especially effective if you hold your legs tightly together. It works the underside of your thighs and requires strength, determination, and focus. All while building balance and stability.
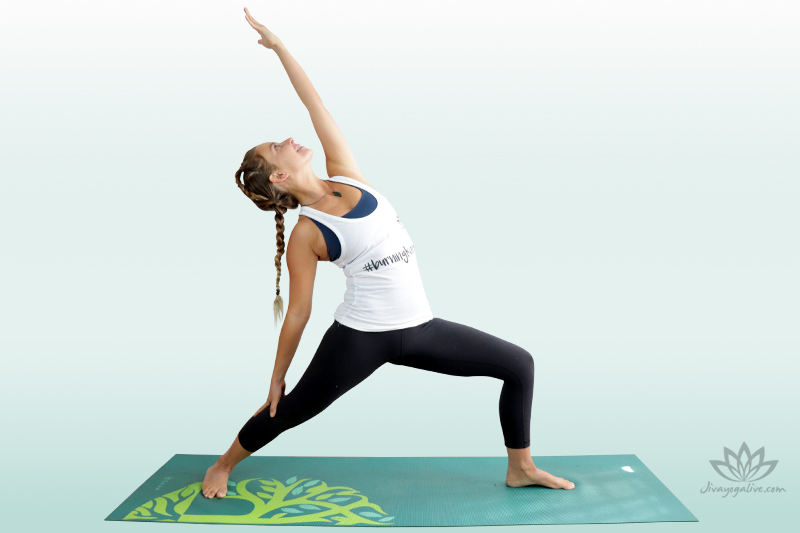
Reverse Warrior Pose – Viparita Virabhadrasana
Inhale and lean forward, turning the palms of your front hands. Lean back, raising your front hands up and back, then come into a backward warrior pose. Keep your legs low and power up by hugging your feet to your midline and activating the undersides of your thighs.
The key in Reverse Warrior is to keep your legs low. It may seem like a release and a moment of rest after the powerful Warrior 2, but remember that the mind often bends before the body is ready, so see if you can hold the low position for a few more breaths!
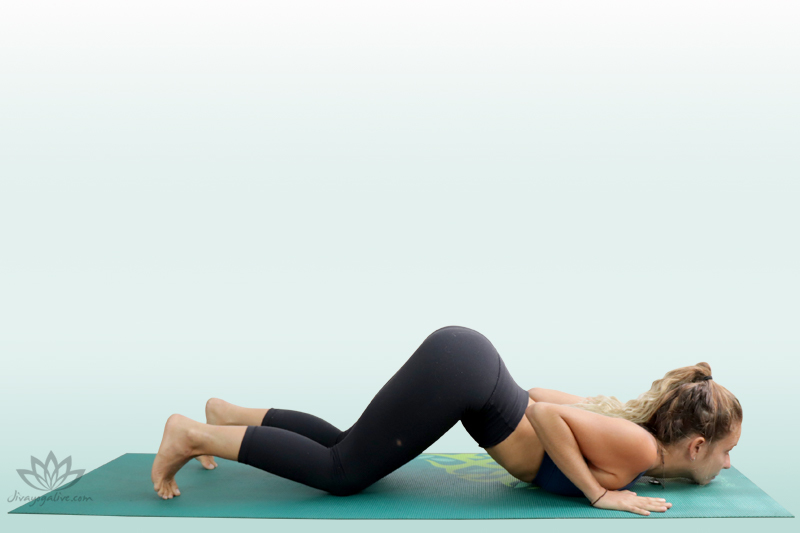
Eight-limbed Salutation – Ashtanga Namaskara
Pull your arms down to the ground and push yourself into a downward facing dog position for a moment. Breathe deeply here, then come into the eight-limb salute , also known as the knees-chest-chin pose. Lower your knees straight down, lower your chest between your palms, and hold the dumbbells in your hands. Your hips and tailbone support the sky. Hug your elbows into your body, your chin slightly on the ground.
The knees-chest-chin pose may seem difficult at first, but the key is to keep the weight in your hands and pull your elbows in towards your body. Everything else is relatively light, with your chin barely touching the mat.
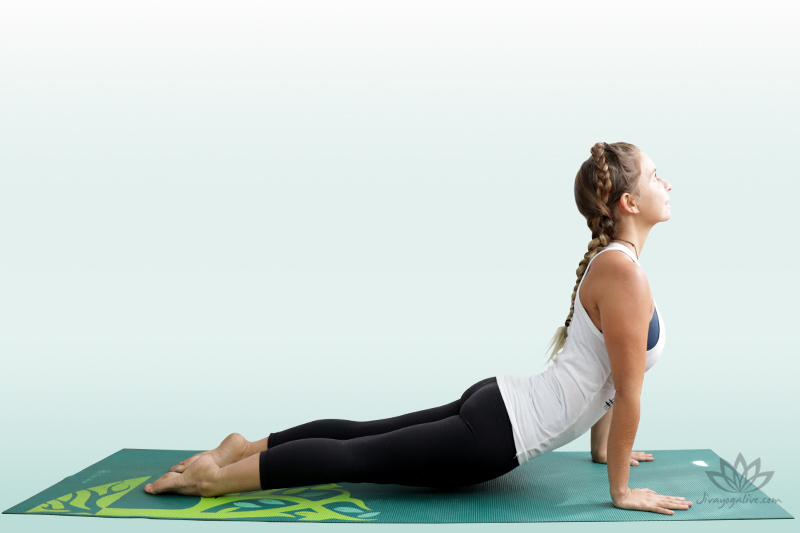
Open hands – Urdhva Mukha Svanasana
Lie on your stomach and slide forward into an upward facing dog . Make sure your shoulders are down, away from your ears, and your shoulder blades are pulled together. Exhale, bend your elbows, and lower your torso and forehead to the ground.
Here you will stretch and strengthen your spine and shoulders, tone your abs, and open up your chest and lungs. It is important to really lift your chest and squeeze your shoulder blades together. There should be plenty of space between your shoulders and your ears.
Downward Facing Dog – Adho Mukha Svanasana
Push yourself back into downward facing dog and then prepare to move to the other side of your body. Notice the difference between the first downward facing dog and the last one in your routine. When your body is stiff, this pose can feel like a full-body workout, but as your body warms up and opens up, it will become easier to do.

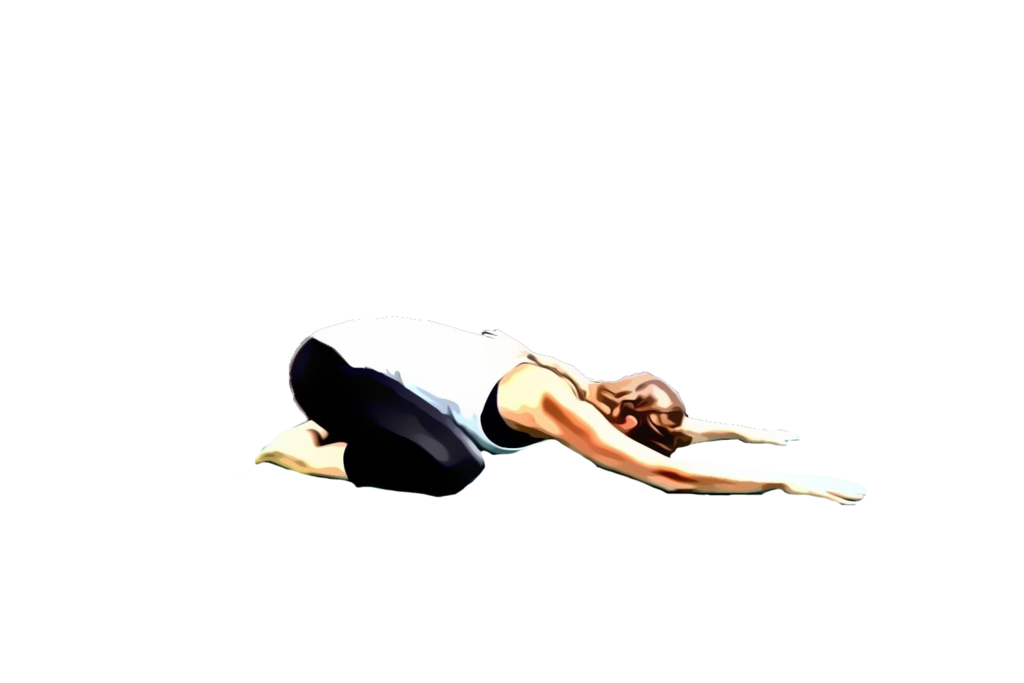
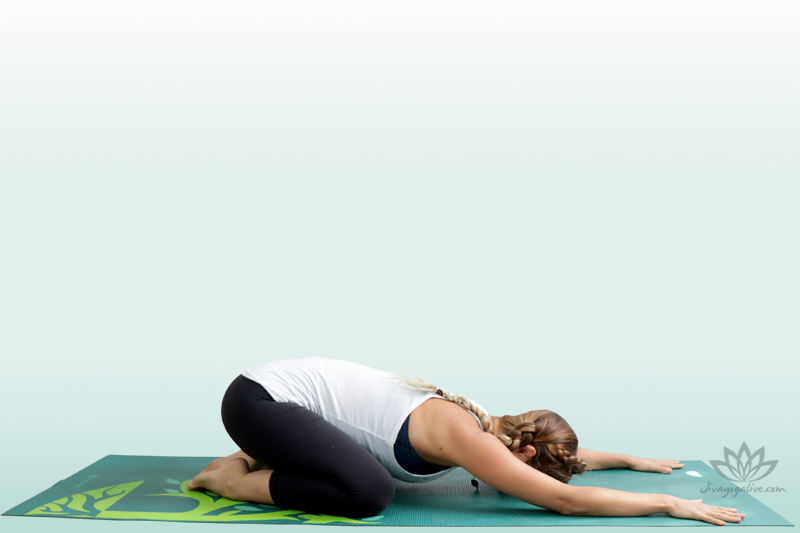
Extended Child’s Pose – Balasana
Once you have completed the rest of your body, lower your knees to the width of the mat and sit in a stretched child’s pose . Drop your forehead to the ground, relax your belly between your thighs and rest.
This is the perfect resting pose, both during and after your workout. It’s a chance to bring everything back into balance, breathe evenly, and lengthen the spine.
Downward Facing Dog – Adho Mukha Svanasana
Featured Video How to Start Yoga at Home for Beginners
Yoga Poses for Beginners
If you’re still feeling a little lost on your mat, that’s okay, I’ve got your back :). I want to share with you some very easy to start poses that will form the basis for most of the yoga practices you’ll be introduced to in class . This also means that you won’t have access to the internet and there won’t be any online tutorials. You can do these simple poses two or three times, spend some time in Savasana (lying on your back) at the end of your practice, and you’ve got yourself a great yoga practice. If you can get familiar with these poses and even their Sanskrit names, you’ll have an advantage when you come to class.
Cat-Cow Pose – Marjaryasana-Bitilasana
Do a few rounds of Cat-Cow Pose which is incredibly fun and therapeutic for the entire back and neck. The opposing movements allow you to stretch and compress the spine, creating more space and increasing mobility. Get really dramatic with the poses by separating your shoulder blades as you mimic an angry cat and drawing your navel all the way into your spine in Cow Pose. Spend a few extra minutes doing some intuitive freestyle movements, moving your spine back and forth, hips from side to side, and rolling – whatever feels good for YOUR BODY to warm up your spine.
Downward-Facing Dog Pose – Adho Mukha Svanasana
Downward-Facing Dog Pose is one of those poses that at first feels like a chore! Your heels won’t touch the floor, your shoulders and arms will tire quickly, and it feels like the instructor is making you sit there for hours. It’s best to keep your knees loose and in child’s pose. But over time, and as you get your alignment right, Downward Dog will start to become your go-to pose. It’s a relaxing pose that will help you loosen up and stretch your entire body between more challenging poses and movements. It’s important to build a foundation for this position early on. I recommend having someone guide you through this pose in class or finding a tutorial online!
Anjaneyasana – Low Lunge
Keep your legs and feet aligned in a simple low lunge and you’ve got a solid foundation that’s ready to move into other standing poses, like warrior pose! Here you get to work on both your strength and flexibility; and there’s always the option of making a variation and dropping your back knee to the ground. This makes the pose very easy and beginner-friendly, but you’ll still be stretching, strengthening, and improving your balance and focus at the same time.
Side Angle – Parivrtta Parsvakonasana
The key to finding comfort in this pose is to hug your feet up toward the midline. This applies to any standing pose to find strength and activate your lower legs. This will tap into your reserves of energy and you’ll be amazed at how much strength you have. Remember, the mind always wants to stop before the body does, so when you feel like coming out of the pose, hold your feet tight and see if you can hold two more breaths!
Warrior 2 – Virabhadrasana
I invite you to stand firmly in this pose, as the embodiment of the fierce warrior, Shiva. When the front leg begins to tire, remember that Zen archers practice holding a bow in this pose for two years before they are allowed to shoot their first arrow. Loosen up by pulling your legs firmly towards the center line, as if you were trying to collapse the mat into the middle. The goal is to stand strong and powerful, but at the same time, to be relaxed and calm.
Cobra – Bhujangasana
An energetic backbend that opens the chest and heart. Bhujang means ‘snake’ and this pose is an essential part of Surya Namaska - Sun Salutation. This is a powerful chest opener and at the same time extremely therapeutic for the spine. It also stretches and tones the abdominal muscles and organs, while stimulating digestion.
Is yoga at home effective?
The more consistent you are with your home yoga practice, the better it will be. As with anything, consistency is key, but that doesn’t mean you have to practice for an hour, seven days a week! Spending twenty minutes a day on your mat relaxing your mind and body will have a profound impact on your life. If there are days when you don’t feel like doing yoga, meditate or practice pranayama.
Meditation
If you are new to meditation, chances are that sitting quietly and trying to quiet your mind will result in a lot of frustration and very little stillness. Meditating this way is actually quite advanced, as you will quickly realize that silencing the stories in your mind can be very difficult. A better option to start with is to find some good guided meditations.
Pranayama breathing
is something we do so naturally that it requires no conscious effort. It is an involuntary act that occurs whether we are awake or asleep. To breathe is to live. Pranayama is the practice of controlling the breath, where Prana means ‘life force’ and yama means to stretch or stretch in Sanskrit. Controlled breathing can reduce the effects of stress, increase concentration and clarity, and can energize and detoxify the body.
A simple Pranayama technique is called Cooling Breath Pranayama / Sitali Pranayama. Find a comfortable and pleasant place to sit. Curl your tongue into a U shape and stick it out slightly from your mouth. If you cannot curl your tongue, you can curl your mouth into an O shape. Bring your chin to your chest and begin to inhale through your mouth, lifting your chin and lowering your neck as far as you can. Close your mouth and exhale through your nose while dropping your chin to your chest.
Repeat for eight to twelve breaths. Any time you spend on your mat is time well spent and over time there will be a cumulative effect and the benefits will begin to ripple and create a domino effect across many areas of your life.
How to Start Yoga When You’re Overweight
Walking into a yoga studio can be a little intimidating if you don’t think you fit the typical yogi image , but yoga can (and should!!) be practiced by everyone. At all ages and stages of life, in all shapes and sizes. We all start somewhere, and there are so many different styles of yoga and poses to suit everyone. If you have doubts and concerns in mind, this is the perfect opportunity to start a home practice.
Jessamyn Stanley is a great role model! She uses yoga to promote positive body image and break down mental and emotional barriers to practice. She emphasizes how you FEEL, not how you look, and she respects her students’ bodies of all shapes and sizes. She has a best-selling book on Amazon called Every Body Yoga: Let Go of Fear, Get on the Mat, Love Your Body, and I highly recommend you check it out!
Yoga is a practice of self-love and body confidence. Love your body and show it kindness by taking this time to care for yourself. With patience, your body will open up and begin to change, so enjoy the journey and let the transformation happen.
Conclusion
A few things to keep in mind before you get started! First, always listen to your body. You know it best and are the only one who can hear its subtle signals. Never force your body into a position and don’t be afraid to change or rest in child’s pose when necessary. Trust that with time and consistency, your body will become more flexible. Now that you have the necessary steps to actually start practicing at home, I guarantee the hardest part is getting on the mat. Give yourself time, prioritize your self-care, and watch yourself grow and develop.
This article has provided the steps needed to set up a yoga routine at home. Let’s get down to the basics, create a space, find some good videos online, and schedule time non-negotiable! Prioritize caring for and loving yourself as much, if not MORE, than you love others. This is not selfish, it is KEY to becoming the best version of yourself, for yourself and for others. You need to fill your cup first, and yoga is a great tool to do that.