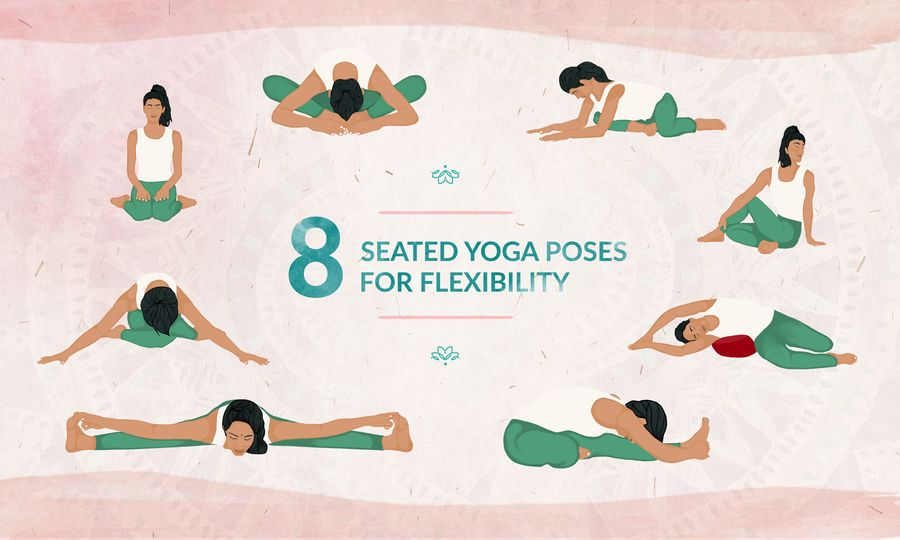
Seated yoga poses are an exciting part of the yoga asana practice. They are a great starting point for beginners and a challenge for experienced exercise enthusiasts at the same time. But more than that, seated yoga poses offer a safe way to increase your flexibility.
One of the most common benefits of yoga is flexibility . Many people think that to increase flexibility they need to stretch their hamstrings, and that may be correct. However, your hips need to move in different directions, and other parts of your body need attention as well. For example, tightness in the upper back is a common cause of pain and can even lead to neck pain and migraines .
Your joints and muscles need your help to stay healthy, mobile and strong. If you suffer from mobility issues or simply want to improve your practice, these easy seated yoga poses will increase your flexibility with numerous benefits for the body and mind.
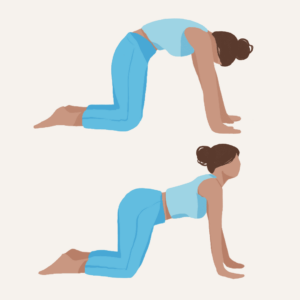
This simple floor pose introduces you to a variety of seated yoga poses, from the gentle Deer Pose to forward bends like Shoelaces and Butterfly Pose. As you practice each asana, remember to find a pose that produces a comfortable level of stretch. Breathe evenly and relax your body into the pose with each exhale.
Easy seated yoga poses to improve total body flexibility
Chair yoga poses, even those done on the floor, are great for seniors and beginners who are slowly building up their flexibility through class. They’re gentle on the knees, provide a soothing stretch, and help relieve back pain and hip tension. Plus, these seated yoga poses target both the upper and lower body, providing multiple benefits during your time on the yoga mat.
1. Half spinal twist (Ardha Matsyendrasana)
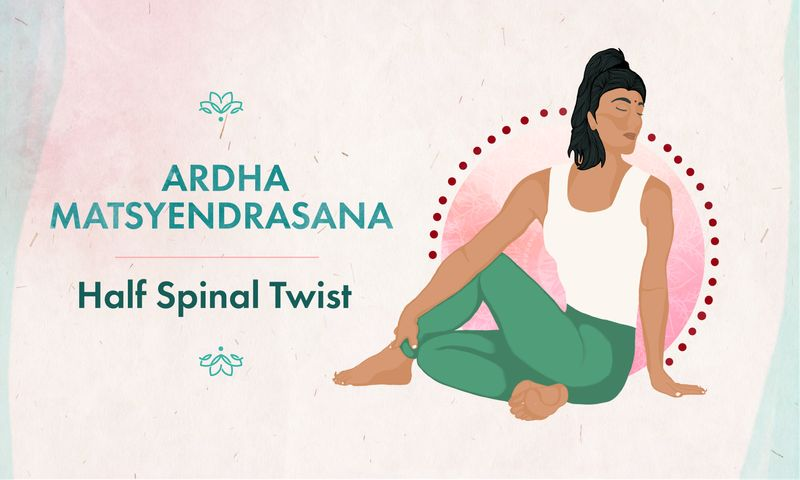
The Half Spine Twist exercise not only increases range of motion in the hips and shoulders, but also throughout the spine. The rotational element frees up the chest area, improving breathing.
How to do a half spinal rotation
- To do this seated yoga pose, start by standing on your mat with your legs extended in front of you.
- Bend your right leg and place your heel on your left hip.
- Lift your left foot over your right knee and place it on the floor, keeping both sitting bones evenly planted on the floor.
- Rotate your torso and place your left hand on the floor (or on a block) behind your spine.
- Lift your right arm and bring your right elbow next to your left knee. If you’re flexible, you can reach further and grab your left ankle with your right hand.
- While looking over your shoulder, slowly turn left.
- To release the pose, slowly roll your body back while releasing your arms and relaxing your legs.
Reference – 10 Tips to Prevent Wrist Pain and Strain During Yoga
Changes and Notices
- To keep your lower back safe, focus on keeping your spine straight and creating an upper (thoracic) twist.
- Keeping your legs straight helps your sitting bones distribute your weight evenly on the floor.
- If you have abdominal, spinal, or sacroiliac joint issues, be careful with this seated yoga pose.
Read: How to Do Yoga Twists: Benefits and Safety Guidelines
2. Rainbow Pose

Rainbow Pose is a gentle seated yoga pose that stretches the hips and side torso muscles and opens the front hips at the top. Find a bolster or thick cushion and practice this pose on both sides. Practitioners who want to further explore the benefits of inversion poses can find detailed instructions on how to practice yoga inversion poses .
How to Practice Rainbow Pose
- Place a cushion to your right and sit with the soles of your feet together in front of you ( butterfly pose ).
- Lift your left leg and flip it over so that your left foot is pointing back behind you.
- Lift your left arm and bend your torso to the right. Lie on your side, supporting your lower back with a cushion.
- Extend your arms straight, hold your head, and rest your palms touching each other.
Changes and Notices
- Choose the mattress size that’s right for you.
- To relieve stress on your shoulders, move your lower arms forward, or place a folded towel under your head if you need to displace your arms.
- If you have pelvic instability, lower back issues, or untreated high blood pressure, you should be cautious with this pose.
How to Practice Yoga for People with High Blood Pressure
3. Deer Pose

This seated yoga pose resembles a resting deer and has a similar leg position as the rainbow pose. However, instead of folding to the side, in yoga deer pose, you fold your torso forward toward your shins, creating a gentle stretch. When practicing this seated asana, repeat the movement on both sides for balanced flexibility. For people with ADHD, understanding the safety guidelines for yoga for ADHD is crucial to practicing yoga safely.
How to Practice Deer Pose
- Sit with the soles of your feet together in front of you (Butterfly Pose). Lift your left leg and swing it back so that your foot passes your hips and points behind you.
- Place your feet close enough to your body so that your sitting bones are evenly touching the floor.
- Slowly bend your torso forward toward your right shin.
- Keep the crown of your head straight and your spine lengthened.
Changes and Notices
- Place blocks under your arms to keep your spine long.
- Sit on a cushion or folded blanket to reduce stress on your hip rotation.
- If you have hip, knee or lower back problems, be careful with deer yoga pose.
Read: How to avoid knee pain and injuries with yoga for sensitive knees
Easy seated yoga poses to improve lower body flexibility
If you have trouble touching your toes or bending forward comfortably in yoga , you may lack lower-body flexibility. Standing yoga poses like warrior pose can improve mobility in your hips, hamstrings, and lower back, but for beginners or those with previous injuries, lowering to the floor in some easy seated yoga poses is a safe and effective option.
These seated yoga poses naturally engage the whole body, but place the most strain on the legs, hips and lower back. You can practice these poses on the floor as part of a yoga flow to release tension in the lower body, or as individual asanas to improve even more flexibility.
4. Knee Pose (Janu Sirsasana)
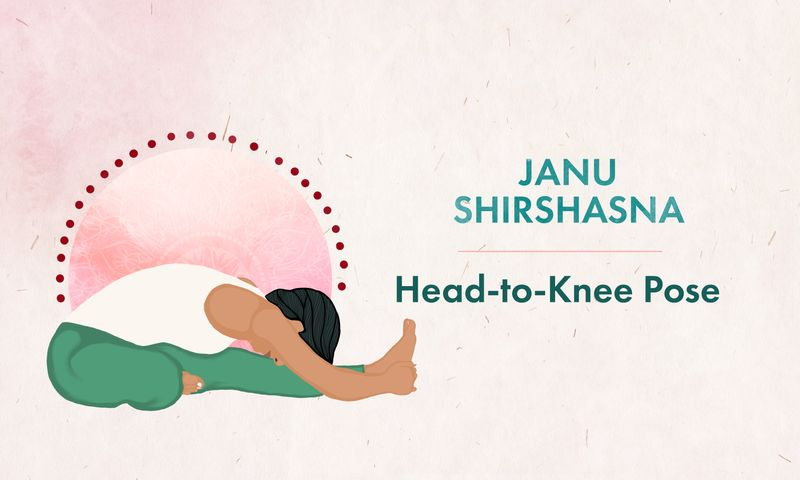
Knee position affects hip range, especially hamstring length. When working the hips, it’s helpful to stretch one side at a time, as the hip bones can be shaped differently on one side than the other. If one hip is always “tighter” than the other, the reason may be bone, not muscle . Stretch gently, avoid pain, and listen to your body.
How to practice Head-Knee Pose
- Sit with your legs straight out in front of you.
- Bend your right leg and place your right foot on top of your left inner thigh.
- Inhale and raise your arms towards the ceiling, keeping your spine straight.
- As you exhale, bend forward and grab your left foot.
- As you inhale, lengthen your torso and slowly draw your lower abdomen toward your left thigh.
- Hold the position for as long as is comfortable, breathing evenly.
- Bend the other leg and repeat.
Changes and Notices
- When you begin this yoga pose, be sure to sit on your mat with most of your weight on your sitting bones, and bend your knees slightly if your lower back is rounded.
- Always start your forward bends from the hips, bending forward with a straight spine initially. If you experience knee discomfort or pelvic instability, support your fully bent knee with a block, cushion, or folded blanket.
- Be careful with this pose if you have any abdominal, spinal or knee issues.
Watch: Anatomy of a Forward Bend: Your Guide to Safe Yoga Forward Bends
5. Shoelace Pose (Adho Mukha Gomukhasana)

Shoelace Pose focuses on hip rotation and stretches many of the muscles around the hip. Be sure to practice this seated yoga pose on both sides and remember that your anatomy may dictate your limitations.
How to Practice Shoelace Pose
- Sit with your knees together and your heels on edge.
- Shift your weight to the left and sit on your left hip.
- Flip your right (top) leg over so that your right knee is over your left knee and your right heel is near your left hip.
- As you inhale, press both sitting bones into the floor or cushion, lengthening your spine.
- As you exhale, lean forward.
- Place your hands on the floor and rest your forehead on your knees or the floor in front of you.
Changes and Notices
- If performing the above poses strains your knees or makes it difficult for you to sit upright, try the following:
- Use a folded blanket or block to support your lower back,
- Extend your legs forward.
- Be careful with this pose if you have any abdominal, spinal or knee issues.
6. Butterfly Pose (Baddha Konasana)

Butterfly Pose, also known as Bound Angle Pose, is a seated yoga pose commonly practiced in Yin , Vinyasa , and Hatha yoga to increase hip mobility. In addition to increasing hip mobility, Butterfly Pose has many benefits, including reducing stress, relieving chronic pelvic and back pain, increasing energy, and promoting mindfulness.
How to Practice Butterfly Pose
- Sit with your legs out in front of you.
- Bend your knees and bring the soles of your feet together.
- Sit upright with your weight on your sitting bones, bringing your feet as close as possible to your pelvis (if you experience pain or pressure in your knees, see modifications below).
- Without moving your legs, inhale and reach them over your head.
- As you exhale, straighten your spine and lean forward, relaxing your back and, if possible, resting your forehead on your hands or the floor.
- Stay in the pose, breathing evenly, for as long as it feels comfortable.
Changes and Notices
- If you have trouble sitting upright, sit on a pillow, thick cushion, or folded blanket.
- If you experience discomfort, place a yoga block under each knee and raise your thighs about an inch higher than the full extension position.
- Be careful with this pose if you have any abdominal, spine, knee, or groin issues: never press your knees into the floor.
7. Dragonfly Pose (Upavistha Konasana)
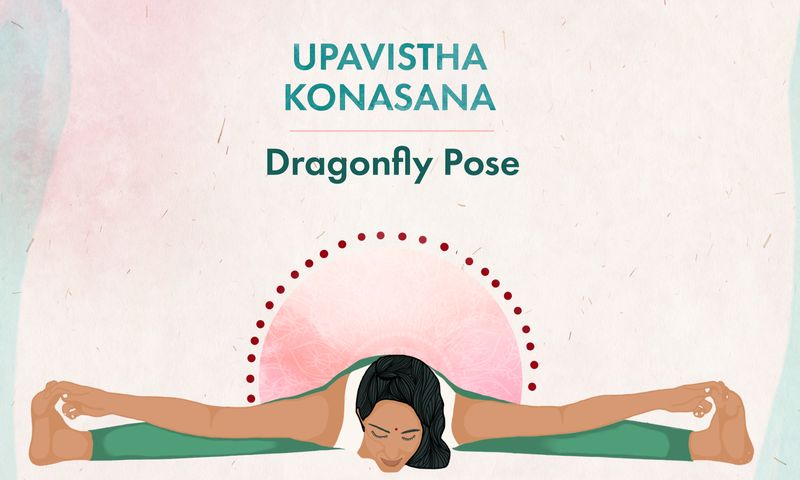
Like any asana that requires flexibility, Dragonfly Pose isn’t the same for everyone. Instead of forcing yourself into the pose, treat your body with some gentle seated yoga stretches. You may feel tension in your groin, hamstrings, or small muscles in your hips and back.
When practicing Yin Yoga Dragon Pose, hold this pose for several minutes to stretch the connective tissue in your legs and release tight muscles, which can increase hip mobility, stimulate your ovaries, and have a huge impact on your overall health and yoga performance.
How to Practice Dragonfly Pose
- Sit with your legs straight out in front of you.
- Support yourself with your hands and place your feet at about a 90-degree angle, or as wide as is comfortable for you.
- If possible, place your hands on the floor in front of you and press your hips forward to straighten your legs. Press through your heels and keep your knees pointing toward the ceiling.
- Rotate from your pelvis and bring your hands forward between your legs.
- If possible, grab hold of your big toes or the outsides of your feet and lower your chest and chin to the floor.
- Hold the position for as long as possible and continue breathing evenly.
Changes and Notices
- Here are some ways to make this pose easier and safer:
- Sitting on a folded blanket,
- Bend your knees as far as possible and place the soles of your feet on the floor,
- Instead of grasping at your toes, use your palms and forearms to support your upper body.
- Be careful with this pose if you have any issues with your spine, groin, or hamstrings.
8. Hero’s Pose (Virasana)

Hero Pose increases flexibility in the hips (internal rotation), quads, and ankles. It’s important to support this seated yoga pose so there’s no unnecessary pressure on the knees. Start in a supported seated position higher than you think you need, and hold the position for a few slow breaths while noticing how your body feels.
How to practice the hero pose
- Sit with your heels on the floor and your knees together.
- Stand with your feet slightly wider than hip-width apart, keeping the tops of your feet flat on the floor. See if you can comfortably lower your buttocks to the floor between your heels. If not, place a cushion or pillow under your sitting bones for support.
- Place your palms on your thighs.
- Sit upright with your back straight.
- Relax your shoulders and face. Breathe consciously.
Read More – Virasana Pose: How to Practice Hero Pose Safely
Changes and Notices
- Placing a block or cushion between your feet to support both sitting bones evenly can help take pressure off your knees.
- You may find it more comfortable if you keep your knees a little wider.
- Be careful with this pose if you have knee or ankle problems: always use plenty of support under your sitting bones to avoid putting strain on your knees.
Safety Guidelines
Whether you are a senior, beginner or advanced yoga practitioner, practicing these easy seated yoga poses as a gentle flow in the morning or before bed is an effective way to increase your flexibility and safely relieve pain. Stretching and flexibility training should not cause pain during or after exercise. It is important to listen to your body and relax or support it as needed.